A Closer look at QoR Watercolor Grounds
Amy Shawley
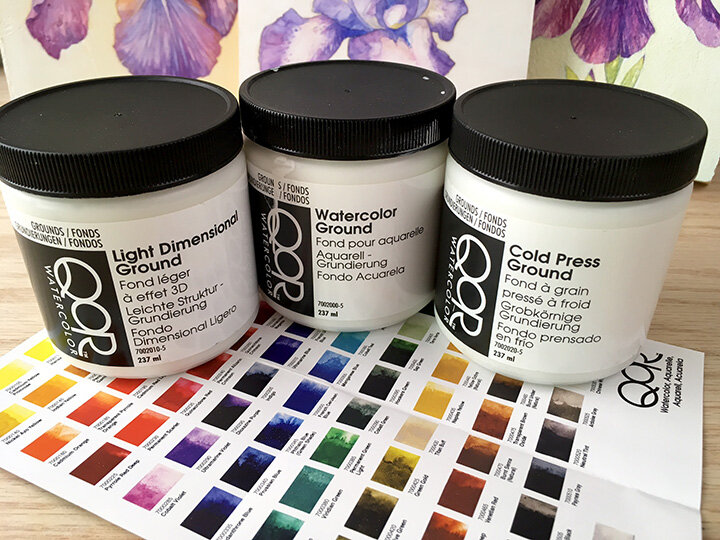
Over the last year or so I've been working a lot in QoR Watercolor and LOVING it. QoR not only offers dazzling richness of color but also options for watercolor grounds! Due to their absorbency and tooth, QoR Grounds make it possible to prepare a substrate like wood, canvas, or panel to receive watercolor and I love the possibilities of painting in watercolor on a surface other than paper!
For those of you unfamiliar with the term “ground” - a painting ground is the foundation of your work! It is the material applied to your substrate before painting and typically has some “tooth” to promote better adhesion of your paint to the surface. A common painting ground is Acrylic Gesso. The main difference between Acrylic Gesso and QoR Watercolor Grounds is that QoR products are formulated to have more absorbency for receiving watercolor. There are three QoR Grounds – Watercolor Ground, Light Dimensional Ground, and Cold Press Ground – they are all bright white and provide a tooth and absorbency for painting, but each one has its own unique characteristics that give artists options for surface finish and texturing possibilities!
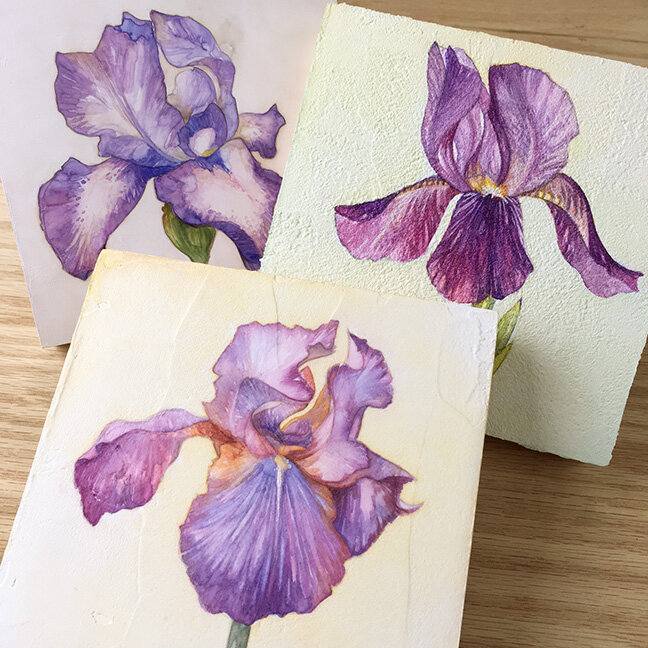
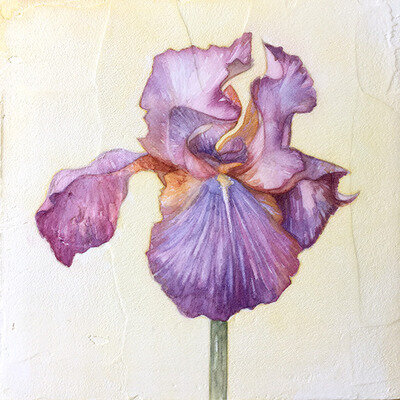
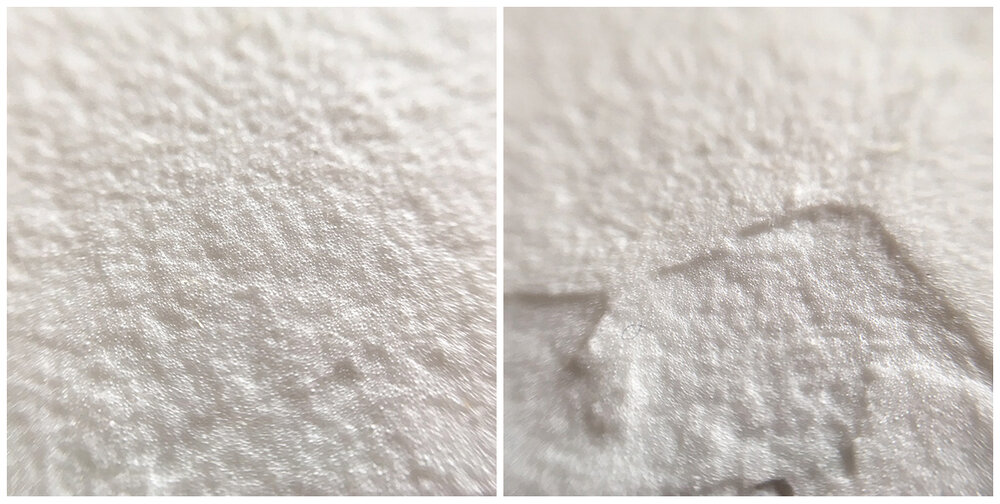
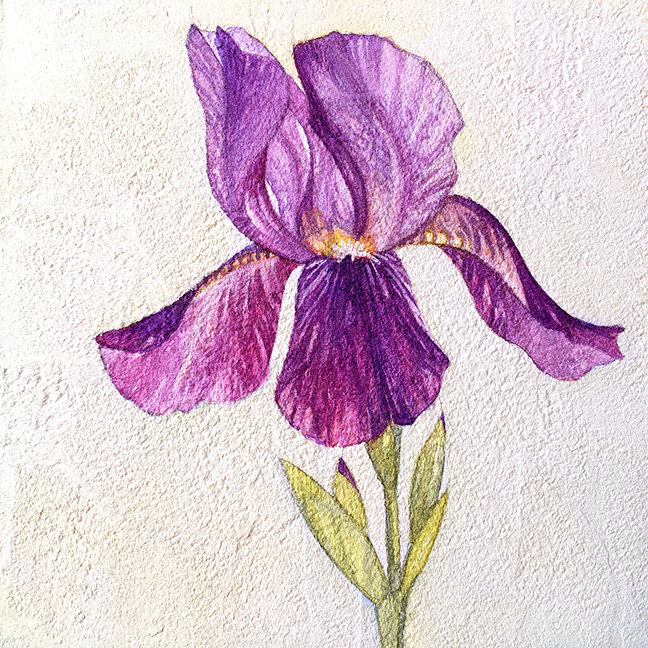
For this blog, I made three small watercolor paintings of Irises over each of the three QoR grounds (applied to a wood panel). I often think about what we'd see if we could stand on the surface of a painting, so I'll be showing you a closer look at these grounds using macro photography then discussing my observations and favorite attributes of each ground. For those of you curious about these grounds, hopefully this will give you some ideas! Be sure to check out the links as well for more info and videos on QoR!
QoR Watercolor Ground:
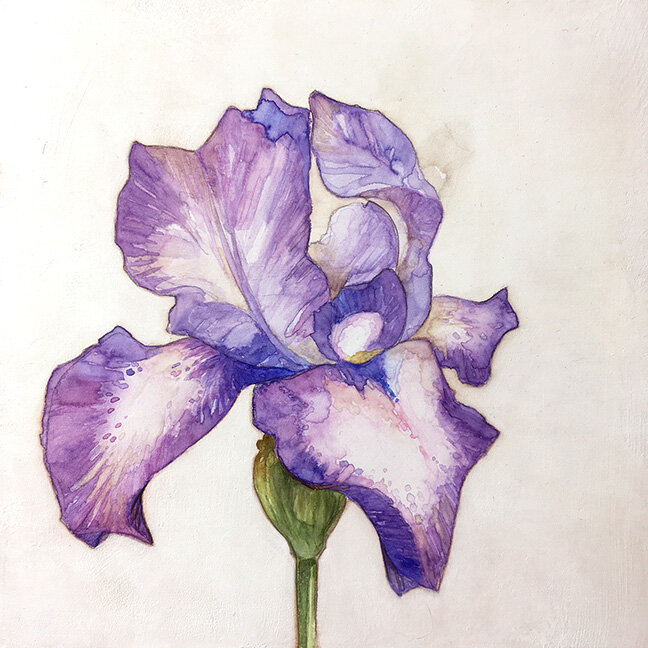
The Process: Before applying the QoR Watercolor Ground to my wood panel, I first thinned the ground on a palette with 20% water to 80% ground...this ground is low viscosity (more liquid than pastey) but the addition of water will help it level better! I used a 2" wide brush to spread a thin, even layer of this mixture across the wood panel. After brushing on the first layer of water-thinned ground I then smoothed out my brushstrokes with a painting knife to get the surface as flat as possible. This first layer sinks into the panel slightly and a second coat is needed to reach better absorbency. I let the first layer dry then applied a second layer in the same way as the first. You could do more layers or not thin the Watercolor Ground with as much water, always do a small test surface to see what you like! Two thin layers gave me enough of the absorbency I wanted, and the subtle painting knife marks left a mild texture towards the edges of the panel (which I liked). In the image below you can see how the Watercolor Ground dried, it has more of a tooth than an Acrylic Gesso, and the texture of that tooth is more absorbent overall.
Observations & What I Love about this Ground:
I start all of my paintings in graphite pencil and this painting ground is lovely for drawing, so it was easy to lay down a light graphite sketch before working in watercolor. A kneadable eraser is best on this surface if you plan on correcting your graphite lines!
The more layers of the ground you apply, the more absorbent the surface becomes. With just two layers, the surface is absorbent but less "thirsty" than more layers (or the other QoR ground options). This made for less of a color shift from wet to dry here because the watercolor wasn't sinking in as far as it would on paper or thicker grounds, it took less color/layers of color to achieve my desired image!
With the finer tooth of this ground, it was my favorite for holding detail and sharp edges, as a painter who loves detail, this is delightful!
Over the dry ground, if my brush was more loaded with color or water, my watercolor would spread out more before sinking down into the absorbent surface (as opposed to paper where everything seems to sink in right away)...I loved how this created some unplanned but beautiful edges on my more detailed brushstrokes. In my macro photos below, you will see how some of the color did not stay in the lines as I thought it would!
I also enjoyed this surface for lifting as I did not have to dig down as deep with my brush to pull up color, and although some of the staining colors were still stubborn on this thinner ground, I did not have to worry about the surface "pilling" from aggitating it too much.

More info on QoR Watercolor Ground can be found here: https://vimeo.com/102045528
QoR Light Dimensional Ground:
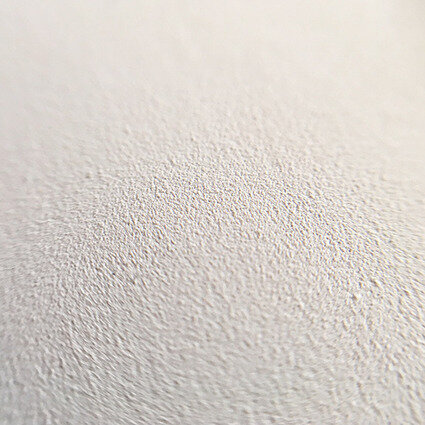
The Process: The Light Dimensional Ground was spread over my wood panel in one layer using a painting knife - this ground is thicker in viscosity than the Watercolor Ground and feels like cake frosting on the knife. While I wanted a relatively smooth and even layer, I did include some subtle knife marks so there would be texture underneath my watercolor. You don't have to apply this ground thickly or in multiple layers to reach great absorbency - my layer was about 1/16"-1/8" thick when wet. This ground shrinks a little as it dries so your layer will look thinner when dry - thinner not as though it lost its opacity but that it is shorter in height off the panel. In the image below you can see how the Light Dimensional Ground dried in both my smooth and textured areas - notice how when viewed up close, you can see the round particulate matter the ground is made of - this spongey material creates wonderful absorbency for watercolor!
Observations & What I Love about this Ground:
This ground is a thick paste that can be manipulated into a textured surface, so while I did not utilize it much in that way for my iris, the possibility is there!
Color will absorb deeper when more water is used, and less deep when less water is used, so that combined with the spongey surface, I found that when layering color this provided a visual depth that was different from the other grounds (see the top macro photo below).
This surface was the easiest for me to lift from - this gets a little techy, but there is a subtle slickness that this surface has, even though it is matte finish and absorbent, pigment doesn't cling to the particulate in the ground as much as it does to the other grounds...staining colors were the easiest to lift from this ground.
It is possible to use graphite on this surface but don't press hard or you will make an indentation in the ground! I preferred to place in my sketch here with a detailing brush instead of a pencil, if you make a mistake it is easy to erase with water on a q-tip.
The firm but sponge-like surface of this ground allows for softer painting effects, edges were less crisp on bleeds and detailed marks which looks quite dreamy!

More info on QoR Light Dimensional Ground can be found here: https://vimeo.com/102044785
QoR Cold Press Ground:
The Process: The Cold Press Ground was spread over my wood panel in one layer using a painting knife - this ground is a thick paste with a fibrous texture and feels like wet handmade paper pulp on the knife! Much like the Light Dimensional Ground, it does not have to be applied thickly to reach great absorbency and my layer was roughly 1/16"-1/8" thick on the wood panel when wet (again, here there will be slight shrinkage from wet to dry). In the image below you can see how the Cold Press Ground dried - notice how when viewed up close, you can see the rough particulate matter the ground is made of - this fibrous material creates fabulous absorbency for watercolor!

Observations & What I Love about this Ground:
This ground has the closest feel to paper and can be textured to either feel like Cold Press or Rough watercolor paper. The fibrous surface texture looks stunning underneath paint!
The roughness of the surface makes it great for dry media and graphite line as well if you desire a sketch underneath your work.
While detail work is possible, some of the fiber texture prevents too much precision, so I love this ground for looser wash effects or images where detail can be more blurred!
Lifting was a little tougher with both staining and granulating colors on this surface due to it's absorbency and roughness, but you will not have the "pilling" that happens when you lift too much from paper!

More info on QoR Cold Press Ground can be found here: https://vimeo.com/102045333
On a final note, you may be wondering how to protect a watercolor surface like this - protection can be done WITHOUT GLASS! Yes! See the links below...
GOLDEN has a wonderful tech sheet on varnishing watercolor: https://www.goldenpaints.com/technicalinfo_varnwatercolor
and a JUST PAINT article on the aesthetics of varnishing watercolor: https://www.justpaint.org/aesthetics-of-varnishing-transparent-watercolor/
along with another JUST PAINT on using MSA varnish over watercolor: http://www.justpaint.org/golden-archival-msa-varnish-over-transparent-watercolor-on-paper/
Also, if you hop over to my YouTube channel, I have a video there on how to seal watercolors with GOLDEN's Gloss Medium: https://www.youtube.com/watch?v=N2pTTnlpLZM